Right now I have two examples for what I would like to analyze in this time based project. The first campaign I wanted to look at was the Real Beauty Campaign by Dove. This project is very inspirational and it helps make the world a better place. Self confidence in girls is a problem and this campaign is really addressing the issue.
The other campaign I am looking at is The Project For Awesome which is a yearly anual campaign and event to raise money for the Foundation to Decrease World Suck. This anual event raises money for various charities. The project for awesome is based on YouTube and many famous youtubers get involved and also get their followers involved. In 2012 they raised over 400,000 dollers for 10 chairtes.
After I decide which campaign I want to look at, I am going to create a video with text, images, music, and a voice over. I want to feature videos and screen shots of websites.
Wednesday, February 26, 2014
Friday, February 21, 2014
Website Post
My Website: studentweb.engl.wsu.edu/355/mpeterson/me
To start off, I made a quick outline of what I
wanted in my website. I jotted down ideas for the different pages I wanted and
how my information should be organized. Then I looked for inspiration from free-css.com. I was looking for something simple for a layout because I
wanted to be able to completely make it my own.


I feel as though my site is very close to what I had in
mind. I worked really hard to make my site look appealing to me and get what I
wanted and where I wanted them. My vision for this website was to have a simple
website that was appealing to the viewer and not crowded with a lot of
information.
If I knew everything there was to know about code, I would
probably add in elements like slideshows to show off my photography. But I
really feel like my website looks the way I really wanted it to.
I definitely used the visual and textual modes. For the
visual, I made an organized site with a more calming color scheme. I feel as
though the simplicity of the colors and organization portrays to the viewer
that I am a more calm and organized person. My first color scheme had a lot of
bright orange colors. I changed the colors because I felt like the site was
giving off a different vibe. It seemed to peppy and crazy which I tend to lean
away from.
With the textual element, I tried to have enough text to get
my point across, but I didn't have long chunks of text on my pages. I wanted
people to be able to look and get a general idea of who I am. I didn't want
then to have to read a novel about my life where I described everything that
ever happened in my life. I stayed away from the aural mode because I've come
to websites where music starts automatically playing and it either scares me or
annoys me.
For my website, I think my use of color is my biggest
strategy. I spent a long time looking for the right color scheme and I even
changed my colors halfway through the assignment in order to get it just right.
I wanted softer colors to convey the fact that I am a very easy going calm
person. One of my favorite colors is blue so that also was a main reason I
chose that as the background color.
My banner at the top of each page is a photograph of me. I
chose this to be the banner to emphasize to the viewer that the site is about
me. It it the first thing that someone would probably see on my site so it
would instantly let them know that this isn't a site about cats or how to fix
your car, it's a site about me.
In the content of my site, I talk about where I am from,
where I live now and other things like my hobbies. I organized these into
different pages to one meet the requirement of three pages but also to have the
viewer find what they were looking for. If they wanted to find out random
things I liked, they could go straight to the Favorites page. I also
accompanied each sub category with a photo that I took. So for my hometown, I
have a photo of the water and sunset since I live on the western side of Washington
right on the Puget Sound. For Pullman, I showcased a photo of a snowy sunset. I
chose this one to go with the sun set photo before, but to contrast between the
blue skies and water. I also put these photos close to the text accompanying it
so that readers get a sense of what they are reading before they read it. On my
hobbies page I put a photo of a self-portrait I made. The piece shows me
holding a camera and the art itself is a digitally made portrait. I put this
next to the Photography and Art section because a viewer would see that image
and know what I was talking about in the paragraph. If I didn't have a photo,
the viewer might get bored and not want to read it. If I had a photo of my cat
there, it wouldn't make sense to the viewer.
Tuesday, February 11, 2014
Blog Post #3
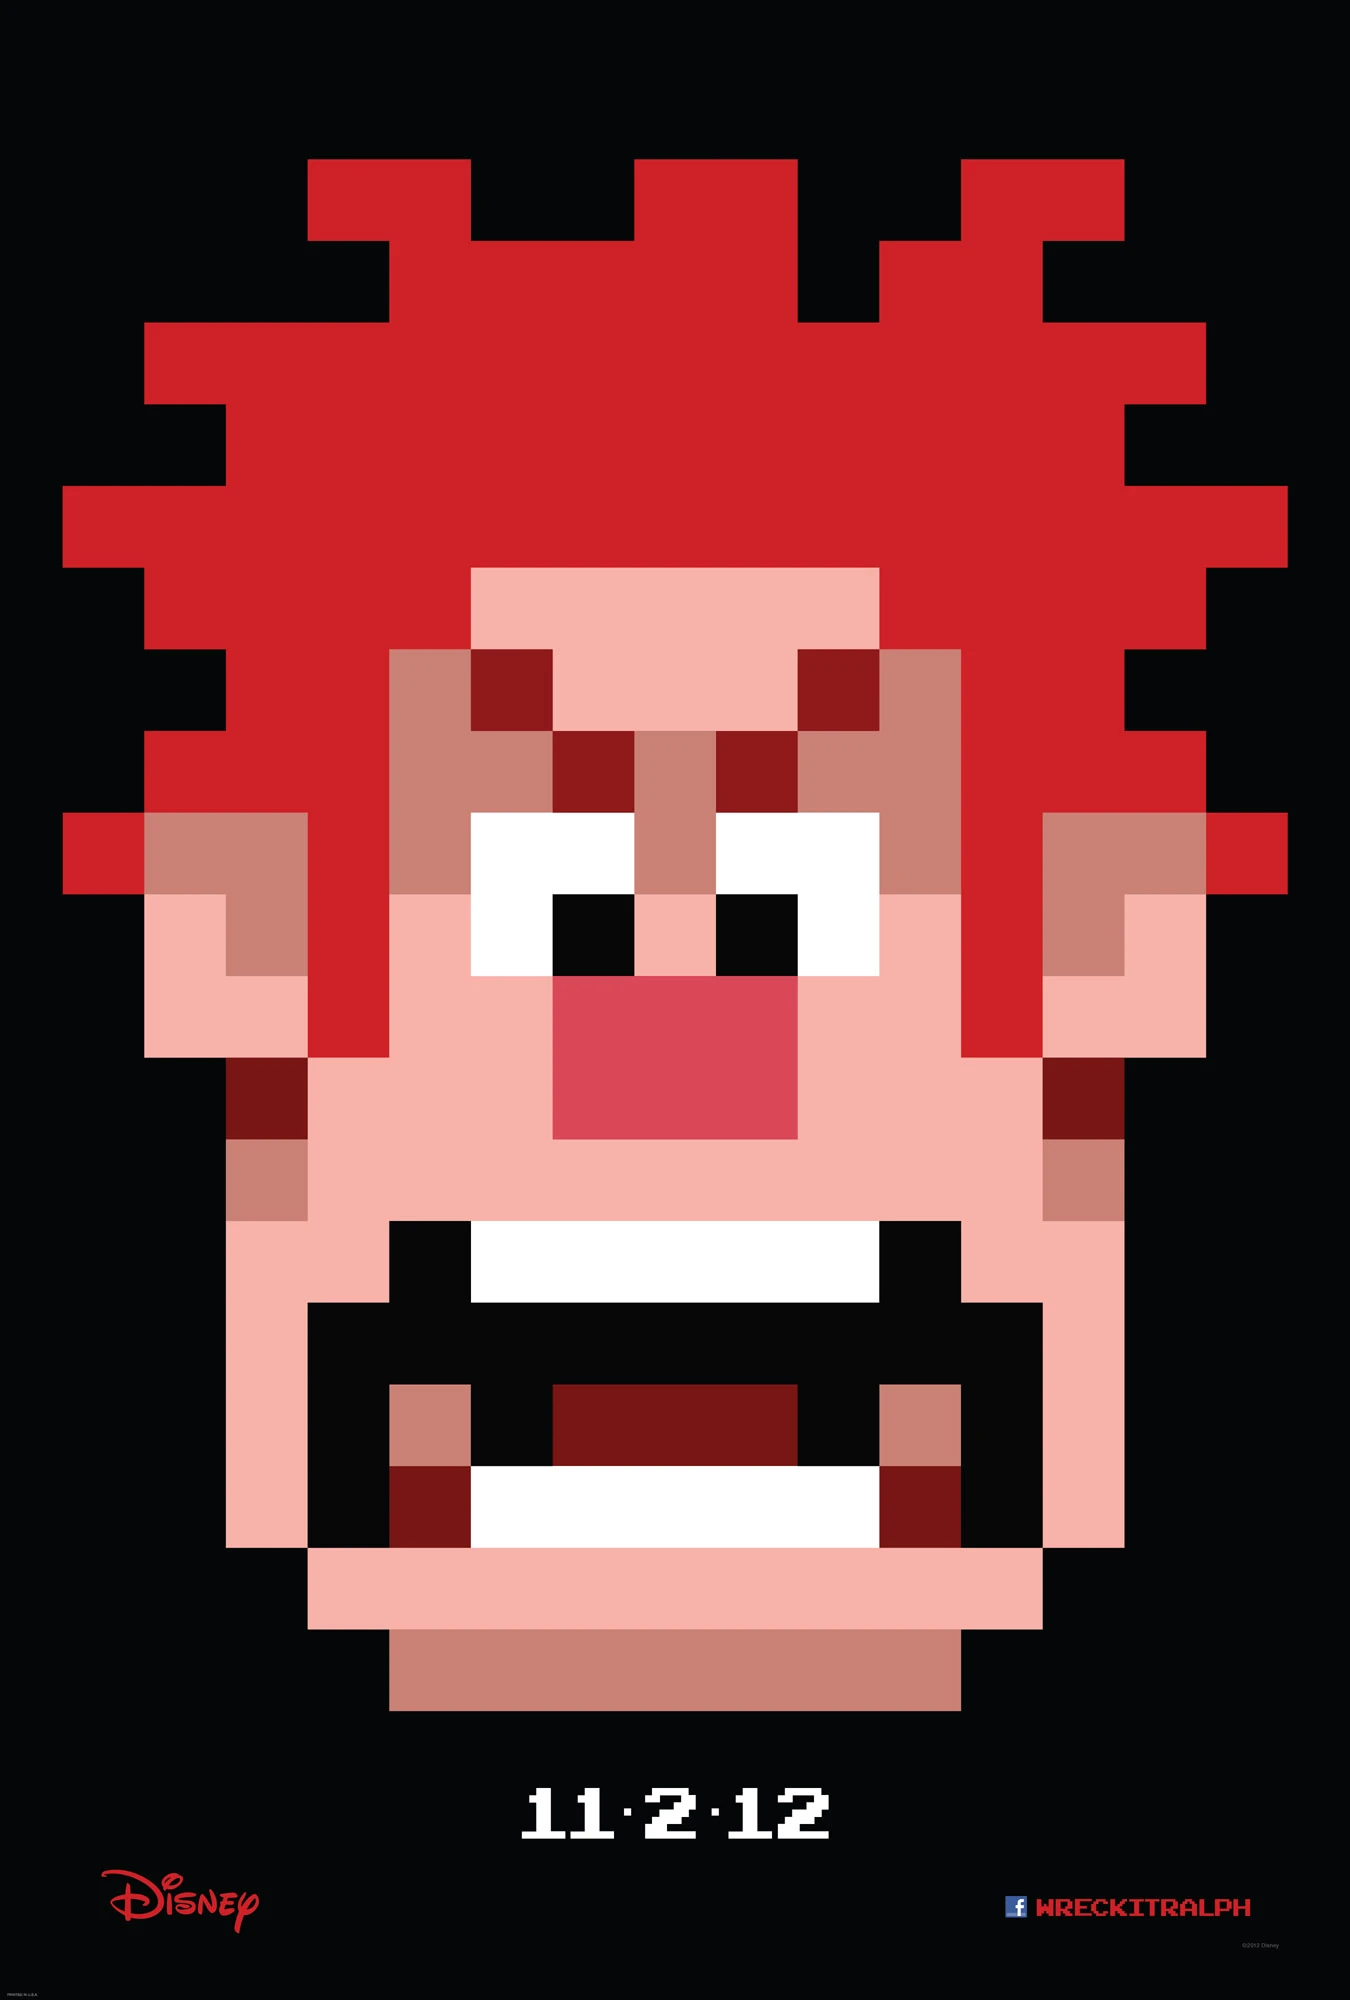
For my multimodial text, I chose this poster:
 I chose this poster because 1) I love almost anything Disney, 2) I love video games 3) I thought this poster was well done.
As for the author, I don't know the actual designer, but this is a Disney movie, so the author could just be Disney. The purpose of this poster is to advertise for the movie coming to theaters. The audience for this poster would really be anyone at the movies. More specifically, children and people who like video games. The genre of the movie is a children's movie. The context needed for this poster would be that it displays the main character in the movie, the character is a video game character, and the game he is in is an older arcade game.
The design choices are what I think makes the poster so interesting. There is a lot of emphasis on the main character being depicted. The head of the character is the main thing we see on the poster. This helps show the context and purpose of the movie and poster because most movie posters have the main character on it. This also emphasizes the 8-bit style of the character. The character does not appear this way in the movie, but the game he comes from features 8-bit graphics. This plays into the movie because the main characters game is older and that is his struggle. For attracting an audience, most video game players will recognize this game style and will want to know more. The colors definitely contrast and bring attention to themselves. The black background gives attention to everything on the poster. The main character in the the center of the poster with the release date right below it. This allows the viewer to make the connection between the date and the poster. Underneath that, we see the Disney logo and the Facebook info for the movie with the movie title. This gives the viewer that extra info if they are looking for it. After seeing this info, the viewer would know that it is a children's movie and they would know the title of the movie and where to find more info. By putting these at the bottom much smaller than the head of the character, it brings the viewer in and gives all the info they need to get people to want to know more. all in all this poster does a good job of making people see the poster easily, but bringing them in and making them intrigued enough to want to know more.
Tuesday, February 4, 2014
Subscribe to:
Posts (Atom)